The best telescopes for stargazing in NZ combine large aperture with portability, such as an 8-inch Dobsonian reflector. These models offer the light-gathering power needed to view deep-sky objects like the Matariki cluster (Pleiades) and the Orion Nebula, while remaining affordable and easy to set up for winter observing sessions across New Zealand’s dark sky sanctuaries.
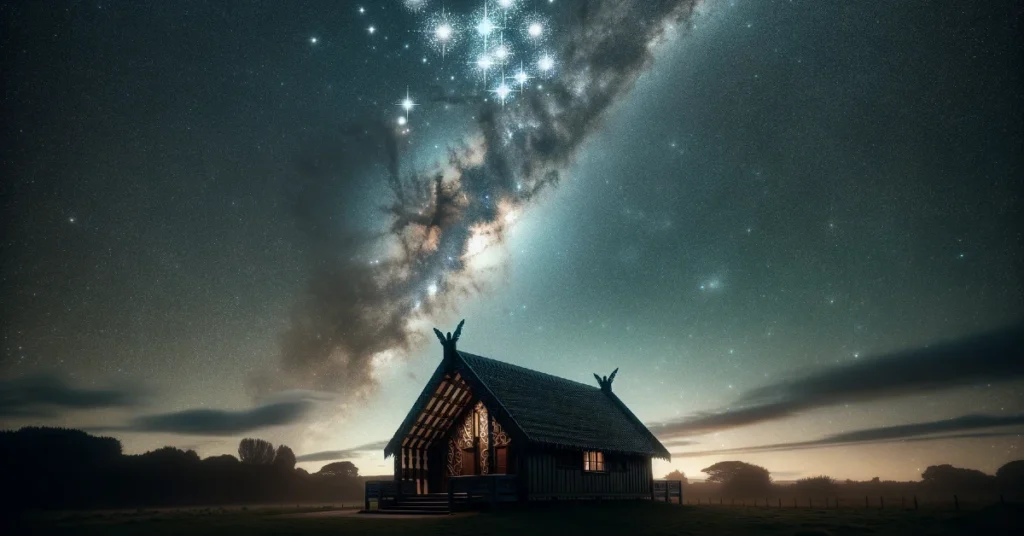
New Zealand is renowned globally for its pristine dark skies, offering some of the best stargazing opportunities on Earth. With the rise of Matariki (the Māori New Year) as a public holiday, more Kiwis than ever are looking upwards, seeking to connect with the celestial navigation markers of their ancestors. Choosing the right optical gear is the first step in transforming a casual glance at the heavens into a lifelong journey of astronomical discovery.
Binoculars vs. Telescopes: Which is Best for Matariki?
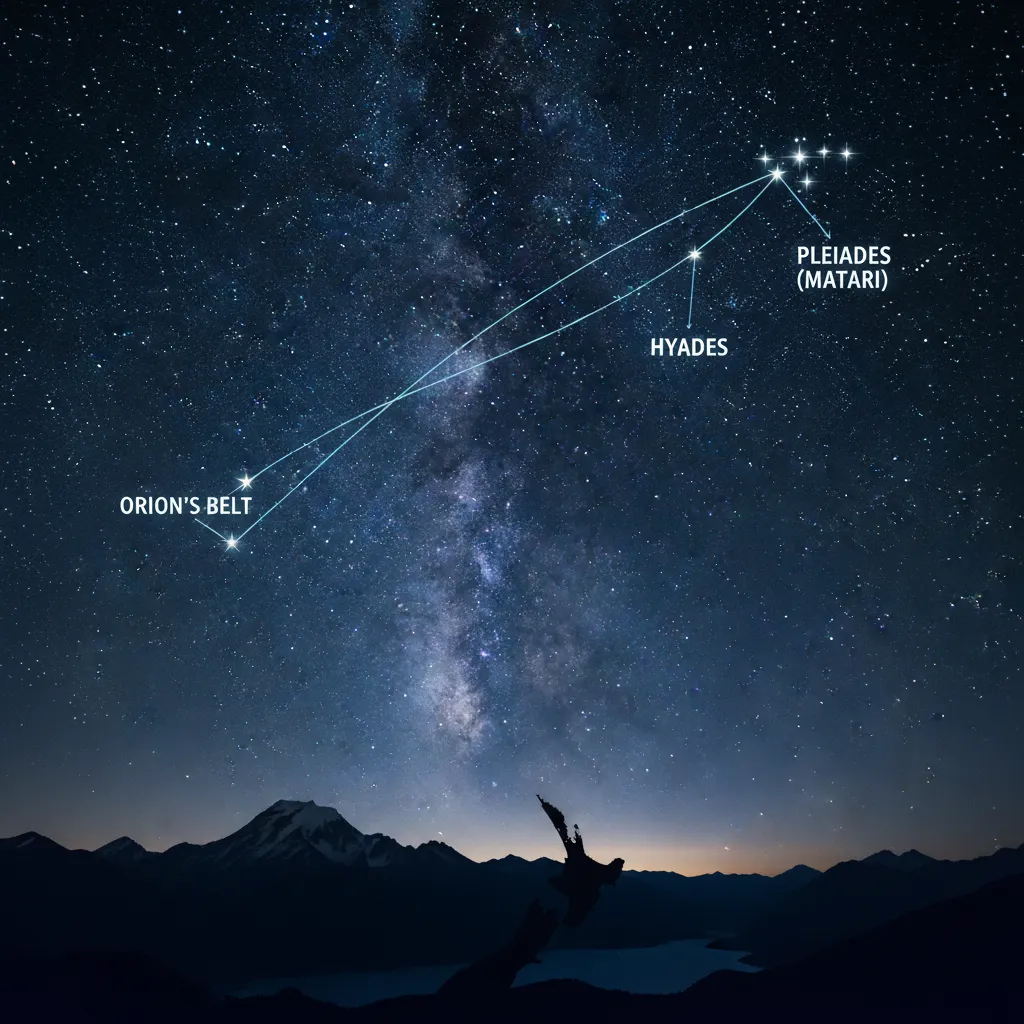
When preparing to view the Matariki star cluster (also known as the Pleiades or M45), many beginners assume a powerful telescope is required. However, expert astronomers often recommend starting with a high-quality pair of binoculars. Matariki is an “open cluster” of stars that spans a relatively large area of the sky. High-magnification telescopes often zoom in too closely, allowing you to see only one or two stars at a time, thereby losing the context of the cluster’s formation.
The Case for Binoculars
For wide-field objects like Matariki, the Hyades, and the Milky Way core, binoculars are superior. In New Zealand, a standard pair of 10×50 binoculars (10x magnification with 50mm objective lenses) is the ideal entry point. They are portable, intuitive to use, and provide a “right-side-up” image, unlike many astronomical telescopes which invert the view.
When to Upgrade to a Telescope
Telescopes become necessary when you want to resolve details on planetary surfaces (like Jupiter’s bands or Saturn’s rings) or gather enough light to see faint deep-sky objects (DSOs) like galaxies and nebulae. While binoculars are perfect for scanning the Milky Way, a telescope acts as a “light bucket,” collecting photons to reveal objects invisible to the naked eye.
Top Beginner Telescopes Available in NZ
The New Zealand market offers specific brands and models that are well-supported by local retailers. When searching for “telescopes for stargazing NZ,” you will frequently encounter three main designs: Refractors, Reflectors, and Compound (Catadioptric) scopes. Here is a breakdown of the best value-for-money options currently available.
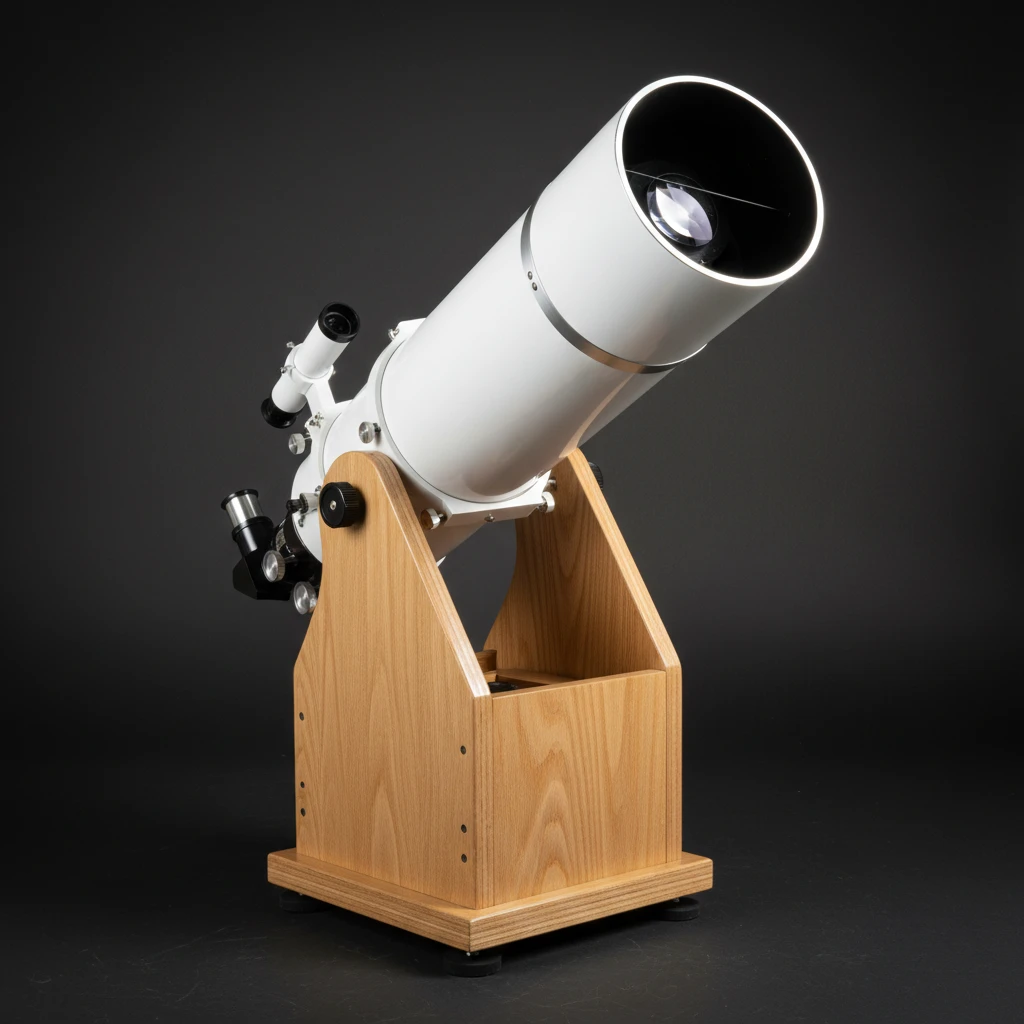
1. The Dobsonian Reflector (Best Value)
For pure visual observing, the Dobsonian telescope is the undisputed king of value. It consists of a simple Newtonian reflector tube mounted on a sturdy, swiveling wooden base. Because you are not paying for expensive electronics or complex tripods, your money goes directly into the optics.
Recommendation: An 8-inch (200mm) Dobsonian (e.g., Sky-Watcher or GSO) is the “Goldilocks” scope. It gathers enough light to show structure in nebulae and resolve globular clusters, yet it fits across the back seat of most cars. In NZ, these typically retail between $900 and $1,300 NZD.
2. The Refractor (Best for Planets and Moon)
Refractors use lenses rather than mirrors. They are robust, require little maintenance (no collimation needed), and provide high-contrast views. However, large refractors become very expensive and heavy.
Recommendation: A 90mm or 100mm Achromatic Refractor on an Alt-Azimuth mount is excellent for viewing the Moon and planets. For Matariki, a “short-tube” refractor offers wide fields of view similar to giant binoculars but with the stability of a tripod.
3. The Schmidt-Cassegrain (Best for Portability/Tech)
These compact telescopes use a combination of lenses and mirrors to fold a long focal length into a short tube. They often come with computerized “GoTo” mounts that automatically locate objects for you.
Recommendation: A 6-inch Schmidt-Cassegrain (SCT) is highly portable and great for general observing, though significantly more expensive than a Dobsonian of equal aperture.
Key Specifications: Aperture and Focal Length
To make an informed commercial decision, you must understand two critical metrics:
- Aperture (The Diameter): This is the most important specification. Measured in millimeters or inches, it dictates how much light the telescope gathers. A 200mm aperture gathers four times more light than a 100mm aperture. In the dark skies of the Tekapo or Aoraki Mackenzie International Dark Sky Reserve, aperture is your best friend.
- Focal Length: This determines magnification potential. A long focal length (e.g., 1200mm) provides higher magnification with a given eyepiece, making it better for planets. A short focal length (e.g., 600mm) provides a wider field of view, ideal for the Matariki cluster.
Essential Gear for Astrophotography
Capturing the beauty of the New Zealand night sky requires different gear than visual observing. The rotation of the Earth causes stars to trail in long-exposure photos, so the primary requirement for deep-sky photography is a tracking mount.

Star Trackers
For beginners, a dedicated Star Tracker (like the Sky-Watcher Star Adventurer or iOptron SkyGuider) is the best investment. These devices fit between your tripod and camera, rotating at the same speed as the Earth to keep stars pin-sharp during long exposures.
Cameras and Lenses
You do not need a dedicated astronomy camera to start. A modern DSLR or Mirrorless camera with a “fast” lens is sufficient. Look for lenses with an aperture of f/2.8 or wider. A 14mm or 24mm wide-angle lens is perfect for capturing the Milky Way arch over landscapes like Mount Cook or Lake Tekapo.
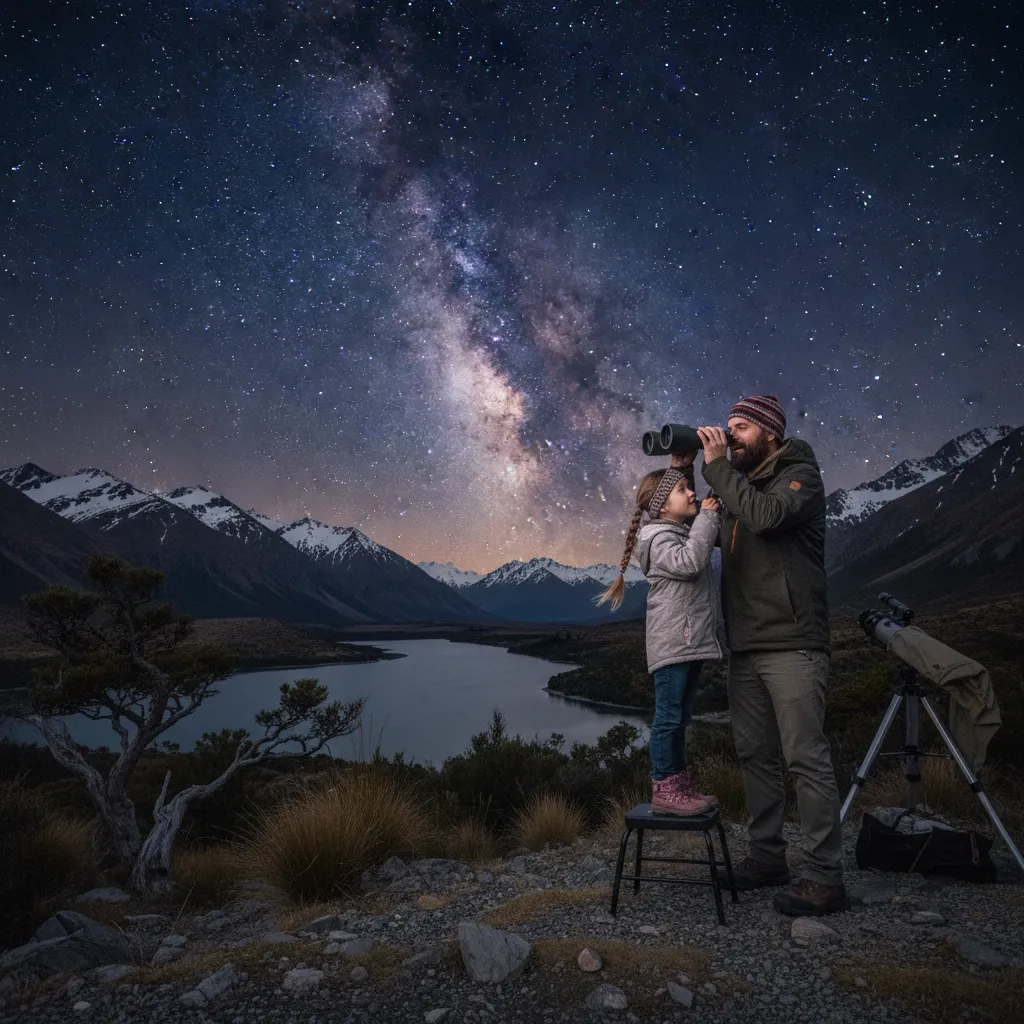
Surviving the Cold: Warm Clothing Guide
Matariki appears in the mid-winter sky (June/July). In New Zealand, this means observing temperatures can easily drop below freezing, especially in clear-sky areas like the Central Plateau or the Mackenzie Basin. Hypothermia is a real risk for stationary observers.

The Layering System
Standing still at a telescope is much colder than hiking. You generate very little body heat. Follow this layering guide:
- Base Layer: Merino wool is essential in NZ. It wicks moisture and retains heat even when damp. Avoid cotton.
- Mid Layer: Heavy fleece or a wool sweater to trap warm air.
- Insulation Layer: A high-quality down or synthetic puffer jacket.
- Outer Shell: A windproof and waterproof layer. Dew is common in NZ winters; without a shell, your down jacket may get damp and lose insulation.
Extremities
Your hands and feet will suffer first. Wear two pairs of socks (thin liner + thick wool) and insulated boots. For hands, fingerless gloves with a mitten flap are popular among astronomers, allowing you to manipulate telescope dials without exposing your skin for long.
Where to Buy Optical Gear in New Zealand
Buying from reputable NZ specialty retailers is crucial for warranty support and expert advice. Avoid department store “toy” telescopes, which often have poor optics and shaky mounts that frustrate beginners.
Specialist Retailers
Jacobs Digital (Auckland): A well-established photography and optics retailer with a wide range of Celestron and Sky-Watcher gear.
AstronZ (Online/Auckland): Run by astronomers for astronomers. They import high-quality GSO Dobsonians and offer exceptional advice tailored to NZ skies. Remember good Cultural Etiquette when engaging with specialized local businesses.
Photo & Video International (Christchurch): Excellent source for optics in the South Island, particularly helpful for those heading to the Mackenzie Dark Sky Reserve.
Frequently Asked Questions
What is the best telescope for a child beginner?
For children, a tabletop Dobsonian (like a 100mm or 130mm model) is ideal. They are durable, easy to point, and require zero setup time. Avoid cheap refractors on flimsy tripod legs, as the wobbling makes them difficult for children to use.
Can I see the Southern Lights (Aurora Australis) with a telescope?
No, telescopes are not suitable for viewing Auroras. The Aurora Australis covers a massive portion of the sky. The best way to view it is with the naked eye, or to capture it using a camera with a wide-angle lens mounted on a tripod.
How much does a good beginner telescope cost in NZ?
A high-quality entry-level telescope typically costs between $400 and $800 NZD. A “lifetime” telescope like an 8-inch Dobsonian usually sits in the $900 to $1,300 range. Be wary of any telescope under $300, as optical quality drops significantly.
Do I need a computerized (GoTo) mount?
Not necessarily. While GoTo mounts can find objects for you, they require power, alignment, and are more expensive. A manual telescope forces you to learn the sky (star hopping), which is a rewarding skill, especially during Matariki celebrations.
What is the best time of year for stargazing in NZ?
Winter (June to August) is the best time for stargazing in New Zealand. The nights are long, the air is often clearer and less turbulent, and the galactic core of the Milky Way is high overhead. This coincides perfectly with Matariki.
Why is Matariki important for stargazers?
Matariki (the Pleiades) marks the Māori New Year. Astronomically, it is a brilliant open star cluster best viewed in late autumn/early winter in the pre-dawn sky. It serves as an excellent target for testing optical gear due to its brightness and distinct formation. Don’t forget traditional knowledge regarding food gathering, like Harvesting Kai: Kumara & Seafood, which is also connected to the cycles of the year observed in the sky. If you’re unsure of the best viewing spot, check out our Interactive Night Sky Map Tool: Locate Matariki Now.